


No comments
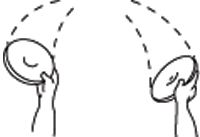
Playing with both sides
Jamming, everybody’s jamming. What a beautiful day. “Gimme an upside-downer.” Snap. “Now a rightside-upper.” . . .? A rightside upper? . . . That’s it! Oh, it finally makes sense! That’s why my mind is so captivated disc shaped pieces of plastic. Unlike the rest of the things I have been playing with all my life, a flying disc has two (count ‘em 2) distinct and very different sides. Is that why it is so different from the “objects” of other sports? Sideless baseballs, footballs, javelins, shot-puts, and hockey pucks all operate different principles. Even our fat cousin the discus just missed the point.
But surely not all sporting objects are so underprivileged that they are deproved of sides. No, pole vaulters and swimmers both have a top and bottom. So what’s the difference? The pits and pools don’t spin!
Let’s forget about that and get on to the joyfully limitless innovations of disc players. Once these guys start a disc spinning no part goes untouched. Just like the tired old story of the Indian and their buffalo, great freestylers find a use for every single bit of the disc. They nail delay the top and bottom, rim delay the inside and outside, use the ridge on Wham-O’s C mold, and somehow find flight ring delays on the old models. They can MAC the top, airbrush the side, padiddle a disc, and even breath delay a mini. Now with all this use, what I want to know is why no one hot stamps the bottoms!
These freestyle techniques sure get confusing and, in fact, quite overwhelming. By the time any one of these skills is copied, the state of the art has changed so drastically that there seems to be a constant need for something newer. But like any kind of technique it always goes back to the basics. For me, this is the nail delay, one side at a time.
The first time I saw a nail delay, I was totally mystified. “Hey, did you see that; man, what is going on around here?” I wanted answers and it drove me bananas, because unlike other sports, there was no way I could experience the big star performances vicariously. To relate to Dr. J all I have to do is to set up a six-foot hoop, but a nail delay…? About two months and a thousand questions later, I had attained my first goal; I was confident enough to practice an above-eye-level-clockwise-spinning-right-handed delay in the house. What a thrill; I laughed and laughed and laughed. Really wonderful, I thought. Now I only with my first teacher had told me to slick the disc. . .
Soon afterward I learned to delay a disc that was spinning upside-down. Quite quickly I found that it is in one way very different from delaying rightside-up. There is a longer walk to pick up drops. And slightly after that I learned about rim delays. If you can find one fingernail long enough to reach the corner of the disc, given enough practice, you’ll soon comprehend that slippery creature that changes curves and alters attitudes. Watch out though, for all their revelations, rim delays introduce extra friction. They are always, always capable of burgling the Z’s right out of your hands.
As I got more into this freestyle stuff my partner challenged me to put together a combination. “It’s the next step,” he said. Well the one I wanted to do the most involved delaying both sides of the disc at the same time. In this case I decided that the axiom about the whole being greater fun than the sum of its component parts is more true than ever.
The first time I saw anybody with hands simultaneously on a disc it was in my first copy of Frisbee Disc World (vol. 3 3). I had been delaying a short couple of months (I think I was up to using WD-40), but the trick was so hot, so state of the elusive art, that it captured my mind. Its attainment was a distant, much sought after milestone. Sought after not to say that I was physically capable of doing it, but to understand the disc well enough to comprehend just exactly how the trick would work. I had been playing with balls all my life, so I can sort of understand Dr. J levitating over the rim, but gyroscopic forces on a disc are another matter all together. Chris Taylor, who had written the Frisbee World Disc article, seemed to speak of the trick as though he was still a little mystified by it. The masters told him it was impossible, but still he knew that with the right tools and enough preparation its accomplishment was well within the physical laws of the universe. Such exploration is one of the very essential elements of our sport. People are just beginning to pioneer what a flying disc can do. So to our minds we can only say, “lead us not into limitation, but deliver us…” It’s so easy to get carried away. There I go again.
Back to the story. Before I had even seen a live and in person turnover, I knew that the crux of the matter was that the direction of the spin changed from one side of the plastic to the other. Chris Taylor told us that. So I, just like he, spent my time learning both spins on both hands. It was frustrating watching my friends accomplish more and more complicated single spin moves while I was in the elementary stages of both spins. I told myself that it would pay off and I’d one day put each spin together in a single package. It happened.
Chris said that in a turnover a clockwise spinning disc goes over to the opposite, counterclockwise spin. From playing with this idea and a disc, another self-evident realization came to mind. The disc also goes from one hand to its opposite, and again from one side of the plastic to its opposite. Everything, I thought, goes opposite: upside-down to rightside-up, left to right, and counter to clock. So 2x2x2=8. Therefore, there must be eight turnovers, if you could take either spin on either hand on either side of the disc, and turn them all over to their opposites. (I really am not sure if it is possible to turn them all the way over to anything else, but who knows?)
The fact that there had to be eight possible turnovers was obvious given a little thought. Accomplishing them is another story. Comprehending each one was my real goal, because I knew that would teach me about how a flying disc works. The physical part would come later. It was quite by accident that I learned a little about how our universe works. I told a scientist friend of mine that I didn’t know why the under-side was always spinning opposite its top. “It’s simple,” he said “why can’t you understand it? The same thing would happen if you turned over the earth. It would be spinning the other way.” Food for thought.
After studying the situation a bit, I was able to ask more than, “show me how to turn it over.” I asked everybody to show me their different turnovers. I learned first that it takes a lot of spin to do the trick. A rim delay causes a lot more friction that a nail delay, and a turnover is often both at once. Mega-Z’s are a must, especially at the beginning. A few extra can help us salvage our mistakes.
The next step was learning the pressure points both top and bottom. This essentially means knowing where to push and where to pull. My first turnover was upside-down to rightside-up. I started with my top hand pressing next to the rim and my bottom hand trying to turn the disc over. A rim delay (the top work on an upside-down disc) supported by a nail delay caused almost a total loss of spin. I finally got it though, and learned the risks: even with hot Z’s a turnover takes its toll.
The people who patiently taught me could show three turnovers that started clock: two upside-down and one rightside-up. The pressure points for each one were different. I found a lot more to it than just trying to keep a fingernail in the center. There is a balancing act with a hand on either side pushing the disc out of parallel with the ground. All this before righting it on the other side. Taking what we had learned from the Frisbee Disc World article, my friends and I extrapolated a bit more. Since one turnover started upside-down clock on the right hand, we figured we could learn the same thing starting upside-down counter on the left hand. With practice and experimentation we took the three tricks we had learned and turned them into six we understood.
The disc does go over and come up so we knew that the pressure points we had learned about did work. But I couldn’t help wondering if these points where optimum. What could be realized from trying some new ones? Well, a great thing happened when, for once, I moved off the rims. A lot of spin was left when the disc came over. Instantly I realized how and why the friction factor had been reduced, but more importantly, for the first time I felt the gyroscopic forces of a spinning disc. They were powerful; it was hard to turn the disc off its plane. There was real energy there. It reminded me of holding the axel of a spinning bicycle wheel and trying to change its plane. Now more than ever, I was left questions about the forces that act on a spinning disc. And questions about what else could be done with them.
Soon afterwards I began the familiar ritual of setting myself up, trying to figure out the seventh and eighth turnovers. Mostly I was pushing down on the disc and picking it up off the floor. It’s not such a bad was to spend a lonely afternoon. But all the time I was thinking, “what will happen if I push down here or there.” Finally one went over, and two tries later it was spinning the other spin on the other side on my other hand.
I managed to find out there actually are eight possible turnovers. For a few minutes I thought I knew them all. I was so excited. I was about to really start showing off. Later at home I started thinking about why I should have been able to figure out the last two from what I had known of the first six. “If that pressure point works that way, then this one would have to work this way,” kind of thinking. Clear enough. But, oh no, that means that still another point might work another way. That would mean, if you changed hands or started upside-down or…oh, at least ten or twelve variations, or who knows how many. And they are all related somehow.
Vickers Chambless
Checklist for hosting a tournament
Checklist for running a tournament:
Here is a rough checklist of what needs to be done to run a full scale tournament.
Summary
___ Find a field
___ Decide on a date
___ Find a hotel
___ Organize staff
___ Create a sponsorship proposal
Detail
___ Decide on a site and a date
___ Solicit Sponsors
___ Create a sponsorship proposal
___ Decide what to say to sponsors
___ Talk to prospective sponsors
2 types of sponsorship:
Main sponsor
Possibly name the tournament for them
(i.e. The Jeep Eagle Frisbee Freestyle World
Championships)
Their name more prominently displayed on the field,
the disc, the web site, the t-shirts, in the radio ads,
in press releases, during the TV interview,
in the tournament program (if you do one),
announced over the PA continuouslyRegular (non-main) sponsors
get exposure from the sources listed above,
but not as prominently
___ Secure fields
___ Speak with the grounds keepers to make sure the
sprinklers don’t come on during the event – or that
they don’t over water the field before the event
___ Hotel that will offer group discounts for the players
___ Get a web page up
___ Needs partner list
___ Announce and communicate to Players, Staff, Sponsors, and Media (each
week,
then every time you know something before the tourney)
___ Schedule of events
Consider options (all 4 event finals on Sunday or
1 or 2 of the finals on Saturday)When to post the registration form? ________
Will there be any deadlines or late fees for late entrants? ___
When to post the event schedule? __________
___ Directions/Maps to the field to the hotel, to the parties, etc.
___ Put press releases together
___ Organize staff
___ Get the local media to cover the event
___ Call them
___ Fax press releases
___ Contact radio stations
___ PSA (public service announcement)
___ To become a sponsor of the event
___ Provide a sound system
___ Create a disc design and t-shirt designs (sponsors’ logos on the
designs)
___ Decide on what kind of trophies to have made up
___ Decide on budget
___ Form a Business
___ Start Bank Account
___ Find out how much money the FPA will contribute
___ Make sure you have all the logistics organized
___ Power
___ Sound system
___ Tents
___ Chairs
___ Tables
___ Judging sheets
___ Calculators
___ Pencils
___ 4 and 5 minute difficulty tapes
___ Boom box for diff tape (batteries or plug)
___ Check and Cue boom box and tapes
___ Talley sheets
___ Stop watches
___ Someone to announce
___ Someone to do the sound
___ Someone to do stats
___ Time keeper
___ Where is all the equipment going to be stored?
___ How will it be transported?
___ People to help with setup and break down
___ Graphic artist
___ Tournament logo
___ Poster
___ Flyers
___ Tournament program (Ads from sponsors and other businesses)
___ Web page
___ T-shirt design
___ Sponsor logos
___ Trophy designs
___ Airports info
___ Shuttle service to and from the airport
___ Rental Car info
___ Registration party (where, when, and food)
___ Tournament parties for Friday and Saturday night
___ The awards ceremony (where and when, and directions)
___ Make reservations
___ Organize demos/entertainment between rounds (K-9, hacky sack, martial
arts)
___ Get players package together
___ Organize staff for the registration party
___ Where’s the jam happening on Thursday afternoon
___ Is there a post tournament jam?
Tom Leitner (converted to checklist by Lee Harper)
#other
Flow vs Consecutivity
Flow and consecutivity are similar yet very different in my mind. When judging presentation I look for flow, when judging difficulty I look for consecutivity.
Flow has to do with keeping the crowds’ interest by maintaining a certain level of play – maybe not hitting everything or staying consecutive the entire time, but whatever bobbles, the’s or even minor drops don’t distract from the overall flow the team had built over a period of time…while one quick drop might not break the flow one long drop or two quick drops may. Other factors can effect a judge’s interpretation when judging the degree of flow. For example, keeping the disc moving between team members often makes the routine flow more than having each player just do long center delay combinations. When you watch some vintage footage of the Coloradicals you notice not only how well they flowed but how the excitement would build as they kept the disc moving and as they kept hitting moves. But don’t forget, they weren’t just doing easy moves the whole time…they had to be doing risky enough moves for their to be excitement in the first place.
Consecutivity. Consecutivity is very straight forward. Is a player going from move to move without hesitation or does he have to reset the disc or do a the before going into the next move. Now you may wonder, “What’s the big deal? It’s not that hard to go from one move to the next.” This is true for some moves but far from the truth for others.
For example when doing an under the leg center delay it’s easy enough to regain control of the disc on your finger after you’ve passed the disc under a leg. Now try the same move but add a spin after you pass the disc under your leg and before you regain control on your finger. The mastery of the move can be shown in competition by how much control you have of that move.
If you do an under the leg pass and then pull the disc under another leg directly off the first set – you’ve shown three things. One, that you’ve mastered the first move to the point where you can set it into a relatively small pull out window. Two, you’ve mastered the second move to the point where you can pull the disc from a relatively good set with little room for error. Third you’ve shown you’ve mastered the transition from the first move – which involves balance and footwork.
So, difficulty as it relates to consecutivity is maximized when players do moves into other moves when the margin of error for the moves themsleves and for the transistion between those moves is minimized. Diff is also maximized by the technical substance of the moves which correlates to how technically difficult the move is. How hard is it to do that move under the current conditions, what’s the degree of restriction, the amount of time to master the move, how risky is it, etc.
As you can see just judging difficulty is difficult.
Now, try to take into consideration all that I’ve mentioned and try to judge multiple players doing different moves with muliptle discs all at the same time….then in the middle of their combos the 15 second tape guy says “mark”. Doh!
Tom
Don’t toss that old disc, sand it!
1) Wash the disc off to clean off any sand, dirt or
salt. Then dry it off with a towel.
2) Choose a grit of sandpaper depending on how roughed
up the disc is. (If it’s really rough start with 600
or 800)
3) Rub the sand paper in a circular motion until the
surface is smooth. (this takes some elbow grease!)
4) Go to the next sandpaper grade (If you started with
800 grit then go to 1200 next) and repeat step 3.
5) Repeat steps 3 & 4 until you’ve sanded the disc
with 2000 grit sandpaper. The disc should feel smooth
as silk with no rough spots.
That’s it!
Here are a couple tips…
a. The sandpaper will last longer if it’s wet when you
use it.
b. Before moving to a higher grit be sure to check the
disc surface for any rough spots that need extra work.
c. Don’t forget to sand the inside rim.
Tom
P.S. Here’s a places where you can buy high
grit sandpaper from…
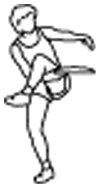
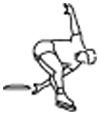
Throws, Catches and the basics
(PDF)
BASIC THROWS
It is very important to learn the fundamentals of throwing before trying more advanced moves. Remember to step towards your target, or at the very least to shift your weight from your back foot to your front foot while throwing. Concentrate on rotating your shoulders, hips and legs through to the point of release, and end with a natural follow through. Keep your arm straight for distance, or bend your elbow and exaggerate the snap of your wrist at the end of the throw for greater spin on the disc. Adjust the angle of your release for accurate throwing.
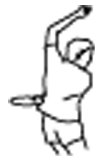
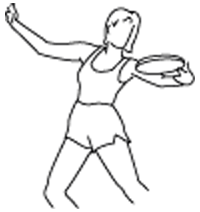
 The Backhand The most common throw is the Backhand release. Stand sideways toward your target, and grip the disc by placing four fingers under the rim of the disc and your thumb on top. Reach across the front of your body, then swing your arm back, releasing the disc towards your target. Tilt the outside edge of the disc down slightly (approx. 30 degrees) upon release and follow through!
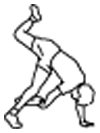
 The Finger-Flip Stand sideways toward your target, and grip the disc by placing your thumb on top of the disc and the first two fingers in the rim. Much like snapping a towel, swing your arm along the side of your body, snapping the disc towards the target. More snap equals more spin. Tilt the outside rim down slightly upon release. Use your wrist snap to propell the disc, not your arm.
 The Thumber The Thumber is much like the Finger-Flip except for the grip. Stand sideways toward your target, and this time place the thumb in the rim with four fingers on top of the disc. Again, swing your arm along the side of your body, waist-high, snapping the disc toward the target. Slightly tilt the outside rim down upon release.
 The overhand wrist flip For this throw, stand facing your target. Begin with the same grip as the Thumber, then turn your arm and wrist over. With your wrist cocked backward, swing your arm above your shoulder and snap your wrist forward towards the target. Remember to keep the outside edge of the disc tilted slightly downward at the point of release.
TRICK THROWS
Trick throws can be created by modifying the throws previously described. Use momentum from spinning or pivoting to create the snap needed to throw around your back, neck or legs. Be creative and invent new throws with your friends.
UPSIDEDOWN To throw the disc upside down, use the previously shown grips. Release the disc tilted slightly upward (Approx. 30o), instead of downward.
CURVE To throw a Curve shot, simply angle the disc upon release of your throw in the direction of your desired curve. Special precautions should be made in windy conditions.
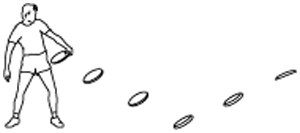
SKIP SHOTS Skip shots can be made by striking the far edge of the disc on the ground between you and the receiver of the throw. Skip shots are easiest on hard surfaces.
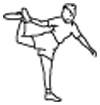
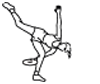
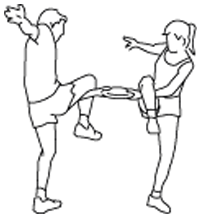
BASIC AND TRICK CATCHES
Catches can be made off of throws from your partner or from your own set-ups, and can be made with either hand. The disc is always spinning, so be sure to make a strong squeeze when catching. Standard catches are made with the thumb up on low catches and the thumb down on high catches. Catches can be made more difficult by spinning around before the catch is made. Below are some examples of beginning and advanced catches, but make up some of your own, that’s half the fun. Catches can be made while standing, running, sitting, lying down or jumping in the air.
Pancake |
One hand catch; High and Low |
UTL (Under the Leg) |

BTB (Behind the Back) |
Bad Attitude (Around the Extended Ankle) |
Flamingo (Around One Leg) |
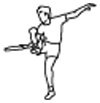
Figure Four (Reverse Under the Leg) |
Behind the Head |
Chair (Around both Legs) |
Triple Fake (Around the Body) |

Phlaud (Around the far side of both Legs) |
Gitis (Around the far leg) |
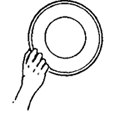
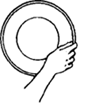
TERMINOLOGY
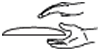
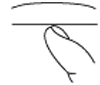 Nail Delay – Spinning the disc on your fingernail allows you to do many things. By balancing the spinning disc in the center, you can maneuver it under your legs, around your body and set it up for catches. Move your fingernail in a small circle underneath the spinning disc. Your finger should move in the same direction of the spin. When outside always face the wind.
Note: Silicon lubricant is used to create less friction.
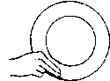
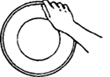
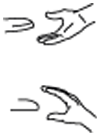
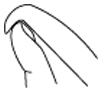 Rim Delay – Similar to the nail delay, this technique involves letting the inside rim of the disc ride on your fingernail. Simply hook your finger so that your nail is the only thing making contact with the disc. This allows you to swoop the disc and create a flowing motion.
Spin – The disc spins two ways, clockwise and counter-clockwise. When the disc is thrown with a lot of spin, the flight will be more stable, and the nail delay will last longer. Also, the disc will hold an angle longer, and be more manueverable.
Percussion – Tips and kicks in the center of the disc offer many moves for the novice and professional alike. It is important to make contact as close as possible to the exact center of the disc. The action should be quick and precise for maximum control. Use your fingers, elbow, knee, head, toe or heel to pop the disc into play or to set for a catch. Experiment with trick tips under your leg, behind your back and with your feet.

Air Brushing – By hitting the disc on the outside rim with either the hand or foot, you can maintain spin and keep the disc in play. It is easiest when there is a slight breeze. Angle the disc upward into the wind and brush across the outside rim. The disc will rebound. Repeat the action or make a catch. Indoors, the brushing action can be used to pass the disc to your partner. Experiment with different hits and kicks into the wind or indoors.
Body rolls – Rolling the disc across your body is fun and easy. The most common roll is the chest roll. First of all, make sure to face the wind, then, while leaning your torso back and with the disc tilted towards you, start the roll at your finger tips. Step into the disc to maintain contact between your body and the disc throughout the roll, and watch the disc progress from one hand to the other.
Co-op – Passing the disc between players by center delay, rim delay, air brush, kicks or tips is called co-oping. For routines on the competitive level, these tricks are choreo-graphed to music.
Freestyle Competition
In competitive freestyle disc play, players organize three, four and five minute routines to music, and are judged on execution, artistic impression, variety and difficulty. Tournaments are held worldwide, and exhibitions can often be seen in schools and at special events.
For a complete listing of freestyle events, please contact the Freestyle Players Association at:
Needed Equipment
For a simple game of throw and catch, a disc is all you need. If you desire to expand your play to the nail delay and other advanced moves you might want to spray the bottom of your disc with a dry silicone lubricant. Spraying the disc will make it slick and nearly friction-less, which allows for easier nail and rim delays. Another part of the equipment needs of professional disc athletes are fake fingernails. Since real nails tend to grind down with extensive play, fake nails are used to protect the real nail and give a secure surface for the spinning disc. Other than that, the only requirements for freestyle disc play are open space and you!
Text by Rodney and Bethany Sanchez
Graphics by Gina Sample
Go against the spin
I am not certain who was the first person to get against but I feel pretty
confident in stating that if there was a record for such things I would be
the career leader. The basic principle of spin is “Natural Procession”. What
that means is when a disc is spinning it wants to go a certain way. As a
person nail delays a disc, they do so by making small circles in the
direction of the disc. If you let your hand go limp the disc will rotate
around your finger the way it is spinning. There is also an anatomical
effect in play. If you are left handed, it is easier to learn to nail delay
clock spin. To test this theory, make small circles in the same direction
with both hands. Which one is easier for the respective spins? Now, to get
against, you must learn to go the opposite way of the spin. The best way to
start to learn this is to practice the “Crank”. There are 8 cranks, 4 with the spin and 4 against. Clock
inside, clock outside, counter inside and counter outside. All delay moves
are a part of a crank, some more than others. Here’s a drill. With clock on the left hand
(opposite hand for counter) take a nail delay and hold it above your head
with a straight arm. Now let the disc down and rotate your elbow to the
outside until the disc goes all the way down under the arm and let it pass
under your armpit until it comes out in front of you. That is a clock
outside crank. Now take a nail delay (clock again) in the right hand. Pass
it under the armpit and lift it up until it is above your head. That is the
second basic crank. It is important to try to keep the disc in the middle
and to try to do it slowly. By doing that, you are gaining a “feel” for the
spin of the disc and it will open up many more moves for you over time.
Now for some keys on how to do it. Try to get the disc to do all of the
work. If you are doing the left hand crank, let the disc tilt slightly
towards you. Then let the disc begin to drop down. It will be much easier
that way. Also, don’t keep your feet still. Rotate around the disc.
Here’s some moves to try:
Cove: This is a left hand (clock) pull done behind the back. Again, try to
tilt the disc so that it is falling in the direction you want to take it.
For extra credit try getting it in the ditch (or rim) and once you get it
through, continue the move into a one-hand turnover.
Juice: This is under the left leg with the left hand. Tilt the disc towards
you, drop it and pull it through. Viola! Magnifique!
BTB Crank: Do the drill I mentioned above and at the end of it, instead of
pulling it through, take it behind your back. Remember to rotate into the
behind that back position as the disc comes around your back.
SKIDS:
Skids are against the spin moves done in the ditch (or inside rim). The
easiest way to do them is with a tilted disc.
Here’s basic Skid:
Throw up some spin with your right hand and extend your left into an
inverted wrist delay. Instead of keeping the disc on the finger, as soon as
you gain control, pull the disc around your back. Again, it helps to rotate.
Keep practicing this. You’ll start to gain a remarkable amount of control
and can use it as a set to other moves.
Skidout:
This is with the right hand (clock). Toss up some spin with and angle onto
your right hand. Freeze it, toss it up slightly then get it behind your
back. As soon as it touches your right hand finger nails drop your shoulder
and rotate around. Booyah!!
Amphibian: This is an inside crank done under the right leg (clock, right
hand). Drop your shoulders into position to get a better angle. Once you get
it down low pop it out.
WINDPLAY: If you are in a benign environment, you should be able to quickly
master some of these moves. Now to take it a step further, take it outside
and engage in some wind play. Think about where the disc is once it comes
out of one of these moves. Take the basic skid (left hand clock btb). If you
are facing the wind and do this move, it will now be behind you and you are
chasing it down wind. Now turn 1/3 towards your left. Now when you do the
move, it comes out into the wind lending itself to a nice floaty pull. Do
another skid like juice and you’ve just done skid row! Call your mom and tell her
“I’m on Skid Row Momma”!!! Actually it’s really Brain Hotel but she won’t
know the difference.
Skippy Jammer
Paul says, “turn it over”
The turnover is probably as technical a move as possible in disc
manipulation. It entails both spins, a myriad of angles and potentially the
whole surface of the disc. To do a turnover requires the ability to delay
both spins, to push the disc flat from an angled orientation and an
understanding of the wind’s (which can be self created) influence on the
disc. A basic clock turnover (a “the” turnover if there is such a thing) to
upside down counter would start with a clock delay in the left hand. One
must precess the disc. The nail will go from the center of the disc towards
the rim until the dome side is angled to a point where the disc can be
pushed with such force so the dome side is pushed into the wind and turned
over to a degree (and somewhat flattened). The finger would be inside by
the rim close to the body with the bulk of the disc away from the body (hand
on inside portion). This requires you to find the position which gets the
dome to be in a position to be pushed into the wind. This push is
essentially a skid as you push against the prevailing spin while pushing
into the wind while elevating it somewhat. To complete the turnover the
right hand needs to pick up the (now upside down) disc (somewhat, not
completely as it is at an angle) and flatten it. This is where right hand
needs to push into the dome upwards, making contact near the lowest point on
the disc, on the other side from the body. This push up will force air into
the “cup” of the disc, equalizing the pressure in it and flattening it. As
this is happening, the finger should precess back towards the center of the
upside down disc. It is kind of like digging out the disc.
The underlying key to a turnover will be the push. This is a
muscle-memory/feel thing and is different for everyone. The stronger the
push, the flatter the disc can become but the higher the risk of a
“blowout”. The push has a few components. The less the push the more the
upside down take will be angled becomes more difficult as the incoming angle
is increased towards near vertical. When pushing the disc over you will
push forward towards the wind (or somewhat across the wind) as well as
manipulating it in an upwards direction.
The ability to find the right body positioning cannot be understated.
However done, it results in the dome of the disc pushing into the wind like
an Apollo spacecraft re-entering the atmosphere and a “pull” which is also a
push to flatten the incoming turned-over disc. All funky turnovers will
have the same pressure point relationships. They will manifest themselves
in many ways, but if you could just focus on the disc contact point, they
will be remarkably similar.
Paul Kenny
Paul Kenny expounds on the Center Delay
Beyond throwing and catching, which are the most fundamental
tools required, initial tooling in my mind has a couple paths.
The outer rim and the center. With the center, you will want
to learn to spin the disc keeping your finger, specifically the
nail, under the center of the disc and in contact with it as
best as you can. This is called a delay. With the outer rim
you want to learn to keep the disc in the air as best you can.
This might include brushing, rolling or kicking and can involve
alot of running around. I will leave the outer rim skills to
one more proficient than I.
When I first learned to delay a disc, I had trouble. I already
knew how to spin a basketball, but had trouble figuring out how
to spin a disc. A spinning basketball, because it has so much
weight away from the center, has a stable center. When you spin
it correctly, the finger “locks” in the center. In fact, I could
spin a basketball on a pencil and hand it to just about anyone
and they could hold it spinning. With a spinning disc, the center
is not stable and the finger wants to drift off center on it’s
own. It takes very small, very quick corrections to maintain
center. It can take some time and repetition to get there.
Further complicating the development of this feel is the gyroscopic
effect intrinsic to spinning objects. When you touch a spinning
disc off center, the disc will “precess”, or turn 90 degrees
from where you touched it. Thus the small corrections discussed
above need to be in the direction of the spin. It will seem
you are always trying to catch up to the correction which wants
to stay 90 degrees ahead of your finger! This results in the
finger seeming to be doing really small circles near the center
of the disc. As you get more proficient, these “circles” and
the corrections get so small that it appears the finger is staying
still in the center of the disc!
Higher level functions such as skids and turnovers will use this
precessive property of discs in a complicated way to achieve
the moves. Skids, or “against the spin” moves work against the
prevailing precession while turnovers are done with the spin
in one direction until the turnover and then with the spin in
the other direction. What complicates it is the need to work
at non-flat angles and switching your brain from one spin’s thinking
to the other.
Paul Kenny
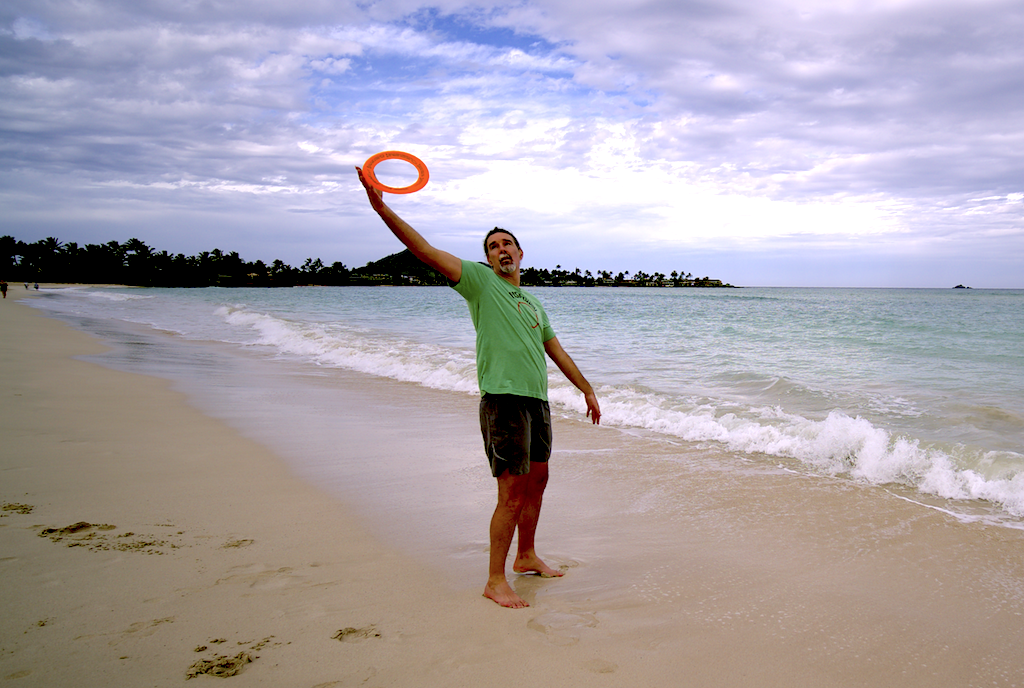
Airbrushing – or – Whiz Rings Kick Butt
Disclosure: The Whiz Ring links below are affiliate links. At no additional cost to you, FrisbeeGuru receives a small commission if you use the link and make a purchase. This helps support our mission.
When the wind is low and you want to work on your wind game, what should you do? Grab a disc and play the wind to your dismay? No….the answer is the whiz ring.
These things are great. They play in next to no wind, are very stable for wind play, and they are hugely forgiving.
What’s more is that Whiz Rings are ideal for learning new moves and teaching new players.
To play with a Whiz Ring there are a few essentials to know. The first of which is what spin you will be playing with. Got that? Now decide what direction you will need to hit the ring in order to propagate spin. (For clock spin, right to left, for counter, left to right)
Once all that is in order locate the wind and face it. Give the ring a little toss into the wind with the nose tilted upward so that the ring may return to you. The throw does not need to be very high or too far in front of you. To brush the ring you will need to hit it in the direction of the spin. For clock hit the ring in-between 4 and 6 o’clock. For counter hit the ring in-between 8 and 6 o’clock. The ring should pop back up in front of you after brushing it. It may be necessary to pursue the ring after brushing. After brushing a whiz ring a few times try a catch under the leg. May I suggest a gitis.
For low wind whiz rings are the ultimate. They float like a disc in an 8 to 10 mile an hour breeze at the beach. The time you have to decide what to do seems like an eternity during play. It opens doors that were otherwise locked in everyday situations.
Another nice thing is how forgiving the rings are. A miss hit does not usually end in tragedy (the ring on the ground). It allows for a shorter learning curve because you spend less time picking the thing up and more time absorbing what went wrong with the hit as you try it again.
How many times have you broken blood vessels in your hands during a brushing extravaganza with a disc? The very notion turns off the average newcomer. Rings offer a safe and fun environment for new players to try brushing.
For whatever reason, people are always willing to try air-brushing. They are not always willing to try the delay. Rings offer brand new players a chance to have fun without feeling like they are busting your jam. Toss the ring up and stand next to them so that you can correct any errors, and there it is a fun way to jam for the first time. Everyone I have asked to give the ring a shot, has tried. Most have been successful.
Obviously one cannot delay a ring. However the ring forces you to learn how to depend on your wind game. I can’t say enough about limiting your scope of focus. It is for me the best way to improve my skills.

Matt Gauthier
Whiz rings taught me how to chest roll. They taught me how to jelly-roll, leg-over brush, leg-over kick-brush, btb brush, scarecrow brush, and generally enhanced my game. They are hard to catch. So you know if you can catch the ring you can catch a disc. Sometimes I will jam by myself for a couple of hours with nothing more than a ring. These things are great, and I recommend them to everyone who wants to play the wind.
This article was written by Matt Gauthier