The Joy of Jamming
So you’ve seen some jammers and you are fired up. They tossed you some spin and a whole new world opened up to you. Now you want to practice but those damn letters on the bottom of the disc keep it from staying on your nail. Don’t fret, the following section will guide you to finding exactly what you need to shred, from the bare necessities to great training devices.
Disclosure: by using these links to purchase, FrisbeeGuru gets a small commission. It costs you nothing extra and helps support our efforts.
The Bare Essentials
To play freestyle Frisbee it is absolutely, positively necessary to have some sort of flying disc. Being as it’s freestyle there are no rules. I’ve been caught air brushing a cd-rom and padiddling my mom’s good china. Jamming can occur at any time, any place with any object. One of my favorite jams was in a bar in Yakima, Washington with a mini disc. All of the best players got that way because they can’t stop playing. Why let a little thing like not having a Sky-Styler or the darkness stop you? You can even chest roll a golf disc if you are careful.
Tried and True, Tools of the Trade
Ok, that was pretty bare. Here are the tools that 90% of professional freestylers use:
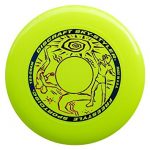
Sky-Styler
The Disc: Disc Craft’s Sky-Styler is the number one choice of flying disc for freestylers. It’s smooth surface, deep rim and just above average weight make it the perfect choice for delays, rim pulls and air brushing in almost any condition.
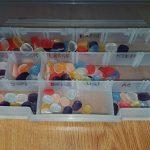
Nails
At an event near you
Fake Nails: Fake nails reduce the friction between your finger and the disc when it is spinning, especially while on a rim delay. They also provide a larger surface on which to delay the disc resulting in greater control. Most people make fake nails out of the tube the krazy glue comes in. Just cut out a piece to fit your finger. Others make the nails out of dental acrylic. These nails last longer and often come in fancy colors. To attach them ignore the warning not to use krazy glue to attach fake nails (at your own risk) and use the Krazy glue to attach the nails. When you are done just jam your thumb nail under one edge and pry them off. The first time hurts, after that it’s a cinch. Not sure about wearing fake nails? Maybe Dan Magallanes can change your mind.
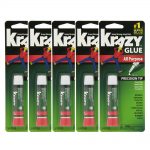
Krazy Glue
Glue: As mentioned above, glue is used to attach the fake nails. Most players use Krazy Glue for this purpose. It’s what I use. Some players like to add a small dab of rubber cement. They believe this creates a stronger bond while still allowing the nail to be removed. Still other players prefer to use sports tape to hold the nail on, forgoing glue all together. To glue on a nail, place a drop of Krazy Glue on your nail. Spread it around so the entire nail surface is covered. Then press and hold the nail on for about 30 seconds. Let is dry for about 1 minute and then place a little extra glue at the back end of the nail for extra strength. Wait 5 minutes to dry and go jam.

Slick
Slick: Slick is used to lubricate the disc to allow for longer spin times. Many different types are used ranging from Silicon spray to Armor All. Most jammers prefer SprayOn brand silicon spray although some believe that a food grade silicon spray works better as it’s dryer and collects less dust. I highly recommend slicking a disc at least once before playing with it. An unslicked disc will tend to be hard to control and will damage easily. However, once that first coat is on you’ll find the life of the disc increases greatly. If you find yourself without slick use water. It won’t last long but while the disc is wet it spins seemingly forever.
Training Tools
Let’s face it. Learning to be a top notch jammer takes dedication. Anyone can go out, mess around and have a great time but to be really good one has to work at it. Fortunately there are some tools that make this process a bit easier.

Whiz Rings
Whiz Ring: Learning to air brush is one of the most important skills to be a good jammer. However, smacking a Skystyler over and over with an inexperienced hand can cause one to hurt more just than one’s pride. Enter the Whiz Ring. It is designed to be a promotional tool. Print an advertisement on it and hand it out to every one you see. Luckily for the freestyle community this ring floats beautifully in a light breeze with almost no spin. Add to that its lightweight design (it’s meant to be cheap) and you’ve found the perfect tool to learn the subtle side of the art of air brushing. With the lightest touch the ring can be sent up into the air and back into play. Wrong angle? Just smack down on it to bring the nose up and it’s ready to fly. After 15 minutes with one of these I guarantee anyone, beginner to seasoned pro will noticed a marked improvement in their brushing skills.
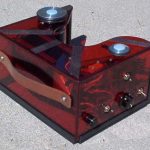
Z-Machine
Tell ’em FrisbeeGuru sent you.
Z- Machine: When learning to delay a spinning disc the first thing one learns is that the more spin the disc has the easier it is to delay. As one gets better they will realize that the more spin the disc has the more tricks they can do. It was with this in mind that the Z-Machine was invented. It is a small apparatus designed to do nothing except put more spin than humanly possible on the disc. Most anyone who has never delayed a disc before can pick it up in a mere 15 minutes with one of these. Many jammers find that they run out of moves before the disc runs out of spin. The pros use these to perfect new moves before trying them in the public eye. Nothing can compare to the Z-Machine for learning delay moves. New Z-Machines are in production. Contact John Thorne here and tell him FrisbeeGuru sent you.
Hard Core tools
Many jammers are happy with a disc, nails and slick. What else would you need, right? Well, some of us are so obsessed that we eat, sleep and breath freestyle. Not a moment goes by that we (yes, I’m hardcore to) aren’t asking ourselves, “how does this pertain to the sport?” This is how it pertains to the sport.
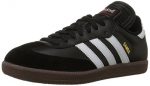
Samba Soccer Shoe
Shoes: Yes, most jammers wear shoes when they play. I’m talking about those jammers who go from store to store looking for just the right shoe. Choosing the right shoe can elevate your game to new heights. Probably most important, is to find a shoe that is form fitting. In hockey, many players will actually wear skates a size or two too small. The same is true of soccer players. Form fitting shoes offer more control, and a greater presence of your foot. It is important to consider a few different things when purchasing a pair of shoes. You will sometimes need to add spin, bump the disc up, or change the angle. Too much leather can hinder the bump and angle change, while not enough leather ruin your ability to add spin. The type of leather makes a difference too. Glossy leather can act as both the angle changer and spin adder. Suede often works best for adding spin. While talking with freestylers, I have learned this, ultimately it depends on your play and what your looking for. A trend that I have observed is the slip-on type shoe. These are form fitting but commonly all material. There is also some question as to their durability. Indoor soccer shoes work well. As you can imagine they are designed with kicking in mind. Pretty handy, but they are often lacking the cushioning that so many of us need. My personal favorites are cross-trainers with a leather outer and material top. It sometimes takes some looking, but there cross-trainers out there that meet all the criteria.
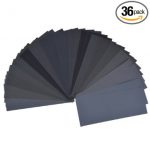
Sand Paper
Sand Paper: This is one of the best hard core tools. Ever look at the bottom of your disc and frown because it’s full of groves? Worried about using that new disc in the sand? Fear not, sand paper will rejuvenate the disc to better than new. Tom Leitner expounds on the finer points of Disc Sanding.
Where to find the tools locally
Unfortunately finding supplies from a local store can be somewhat difficult. The best way to go about it is to find other local jammers and ask if they know where to go. Short of that you’ll have to go store to store until you find what you’re looking for. Another great place to buy supplies is at a tournament. That way you not only meet other players but you support the sport as most proceeds usually go back into the club that held the tournament.