Beginners should concentrate on perfecting a flat throw. Advanced players should work on angled throws to increase the amount of tricks they can perform. Learn the difference between flat and angled freestyle Frisbee backhand throws from a world champion in this free sports video series.
Category: Learn to Jam
This is some text so I can see how this theme works.
Throws, Catches and the basics
(PDF)
BASIC THROWS
It is very important to learn the fundamentals of throwing before trying more advanced moves. Remember to step towards your target, or at the very least to shift your weight from your back foot to your front foot while throwing. Concentrate on rotating your shoulders, hips and legs through to the point of release, and end with a natural follow through. Keep your arm straight for distance, or bend your elbow and exaggerate the snap of your wrist at the end of the throw for greater spin on the disc. Adjust the angle of your release for accurate throwing.
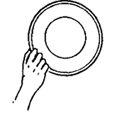
 The Backhand The most common throw is the Backhand release. Stand sideways toward your target, and grip the disc by placing four fingers under the rim of the disc and your thumb on top. Reach across the front of your body, then swing your arm back, releasing the disc towards your target. Tilt the outside edge of the disc down slightly (approx. 30 degrees) upon release and follow through!

 The Finger-Flip Stand sideways toward your target, and grip the disc by placing your thumb on top of the disc and the first two fingers in the rim. Much like snapping a towel, swing your arm along the side of your body, snapping the disc towards the target. More snap equals more spin. Tilt the outside rim down slightly upon release. Use your wrist snap to propell the disc, not your arm.

 The Thumber The Thumber is much like the Finger-Flip except for the grip. Stand sideways toward your target, and this time place the thumb in the rim with four fingers on top of the disc. Again, swing your arm along the side of your body, waist-high, snapping the disc toward the target. Slightly tilt the outside rim down upon release.

 The overhand wrist flip For this throw, stand facing your target. Begin with the same grip as the Thumber, then turn your arm and wrist over. With your wrist cocked backward, swing your arm above your shoulder and snap your wrist forward towards the target. Remember to keep the outside edge of the disc tilted slightly downward at the point of release.
TRICK THROWS
Trick throws can be created by modifying the throws previously described. Use momentum from spinning or pivoting to create the snap needed to throw around your back, neck or legs. Be creative and invent new throws with your friends.
UPSIDEDOWN To throw the disc upside down, use the previously shown grips. Release the disc tilted slightly upward (Approx. 30o), instead of downward.
CURVE To throw a Curve shot, simply angle the disc upon release of your throw in the direction of your desired curve. Special precautions should be made in windy conditions.
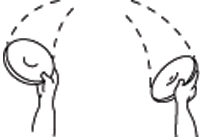
SKIP SHOTS Skip shots can be made by striking the far edge of the disc on the ground between you and the receiver of the throw. Skip shots are easiest on hard surfaces.
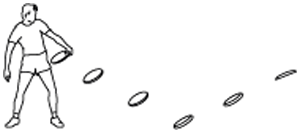
BASIC AND TRICK CATCHES
Catches can be made off of throws from your partner or from your own set-ups, and can be made with either hand. The disc is always spinning, so be sure to make a strong squeeze when catching. Standard catches are made with the thumb up on low catches and the thumb down on high catches. Catches can be made more difficult by spinning around before the catch is made. Below are some examples of beginning and advanced catches, but make up some of your own, that’s half the fun. Catches can be made while standing, running, sitting, lying down or jumping in the air.

Pancake |
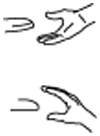
One hand catch; High and Low |
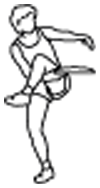
UTL (Under the Leg) |
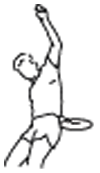
BTB (Behind the Back) |
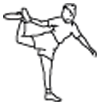
Bad Attitude (Around the Extended Ankle) |

Flamingo (Around One Leg) |
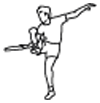
Figure Four (Reverse Under the Leg) |

Behind the Head |
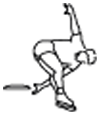
Chair (Around both Legs) |
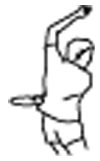
Triple Fake (Around the Body) |
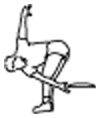
Phlaud (Around the far side of both Legs) |
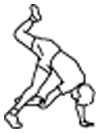
Gitis (Around the far leg) |
TERMINOLOGY
 Nail Delay – Spinning the disc on your fingernail allows you to do many things. By balancing the spinning disc in the center, you can maneuver it under your legs, around your body and set it up for catches. Move your fingernail in a small circle underneath the spinning disc. Your finger should move in the same direction of the spin. When outside always face the wind.
Note: Silicon lubricant is used to create less friction.
 Rim Delay – Similar to the nail delay, this technique involves letting the inside rim of the disc ride on your fingernail. Simply hook your finger so that your nail is the only thing making contact with the disc. This allows you to swoop the disc and create a flowing motion.
Spin – The disc spins two ways, clockwise and counter-clockwise. When the disc is thrown with a lot of spin, the flight will be more stable, and the nail delay will last longer. Also, the disc will hold an angle longer, and be more manueverable.
Percussion – Tips and kicks in the center of the disc offer many moves for the novice and professional alike. It is important to make contact as close as possible to the exact center of the disc. The action should be quick and precise for maximum control. Use your fingers, elbow, knee, head, toe or heel to pop the disc into play or to set for a catch. Experiment with trick tips under your leg, behind your back and with your feet.
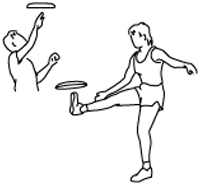
Air Brushing – By hitting the disc on the outside rim with either the hand or foot, you can maintain spin and keep the disc in play. It is easiest when there is a slight breeze. Angle the disc upward into the wind and brush across the outside rim. The disc will rebound. Repeat the action or make a catch. Indoors, the brushing action can be used to pass the disc to your partner. Experiment with different hits and kicks into the wind or indoors.

Body rolls – Rolling the disc across your body is fun and easy. The most common roll is the chest roll. First of all, make sure to face the wind, then, while leaning your torso back and with the disc tilted towards you, start the roll at your finger tips. Step into the disc to maintain contact between your body and the disc throughout the roll, and watch the disc progress from one hand to the other.
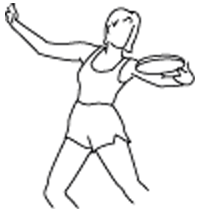
Co-op – Passing the disc between players by center delay, rim delay, air brush, kicks or tips is called co-oping. For routines on the competitive level, these tricks are choreo-graphed to music.
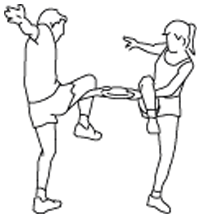
Freestyle Competition
In competitive freestyle disc play, players organize three, four and five minute routines to music, and are judged on execution, artistic impression, variety and difficulty. Tournaments are held worldwide, and exhibitions can often be seen in schools and at special events.
For a complete listing of freestyle events, please contact the Freestyle Players Association at:
Needed Equipment
For a simple game of throw and catch, a disc is all you need. If you desire to expand your play to the nail delay and other advanced moves you might want to spray the bottom of your disc with a dry silicone lubricant. Spraying the disc will make it slick and nearly friction-less, which allows for easier nail and rim delays. Another part of the equipment needs of professional disc athletes are fake fingernails. Since real nails tend to grind down with extensive play, fake nails are used to protect the real nail and give a secure surface for the spinning disc. Other than that, the only requirements for freestyle disc play are open space and you!
Text by Rodney and Bethany Sanchez
Graphics by Gina Sample
Freestyle Frisbee Stretches, Backhand & Forehand Throws : Freestyle Frisbee Backhand Throws
The backhand throw is one of the most popular throws in Frisbee freestyle. Learn how to do freestyle Frisbee backhand throws from a world champion in this free sports video series. Expert: Todd Brodeur.
#beginner


